MacBooks, Lasers, Art, & Science
11 Jun 2018
Nerdy tattoos. That’s how one person described the laser-engraved symbols on my MacBook. Stickers are fine, but sometimes you want to try something new. Besides, lasers are cool!
If you would like to laser-engrave your laptop, here’s a procedure that works. There’s also a brief description for each of the symbols engraved on this particular MacBook.
Warranty
Does engraving void Apple’s warranty? I have no idea. The laser doesn’t cut very deep. But if you’re really concerned about the warranty, you might want to speak with Apple.

Planning
I spent two months choosing and positioning the symbols. Laser engraving is expensive and permanent, so I wanted to get it right. Here’s the path:
- Listing the symbols. I started by making a list of the symbols to be considered for the engraving. Evernote was great for keeping track of everything, because you can make notes anywhere and sync the info to all devices.
- Layout, first draft. Paper and pencil. Just to get a feel for the layout. Key question: How can symbols from math, science, faith, business, athletics, and community service all fit together?
- Layout, intermediate drafts. Back to Evernote. I divided the surface of the MacBook into six sections (left, middle, and right on both upper and lower levels), and I gathered the symbols into groups that seemed to work together. In time, I settled on a pattern: Left is mostly science, with some business woven in, while the right side is mostly business with some science woven in.
- Layout, laser-ready. I chose Affinity Designer because it can generate files in a variety of vector formats (.ai, .eps, .tiff) and an ultra-smooth vector file would ensure a high-quality finished product. Unless you already own Adobe Illustrator, Affinity Designer is an inexpensive and effective way to go.
Laser-Ready Layout

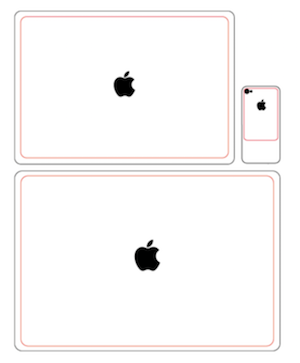
To align everything perfectly, I bought a template from Etsy. Some of the packages include templates for multiple devices, just in case you get the engraving bug and you can’t stop with one laptop.
And even after everything was positioned and templated, I let the design rest for a week before taking it to the engraver. Because engraving is permanent!
Choosing an Engraver
How does one choose an engraver for an expensive piece of electronic equipment? I found several engravers on the web, and visited a few in person. In the end, I chose Chicago Award Source.
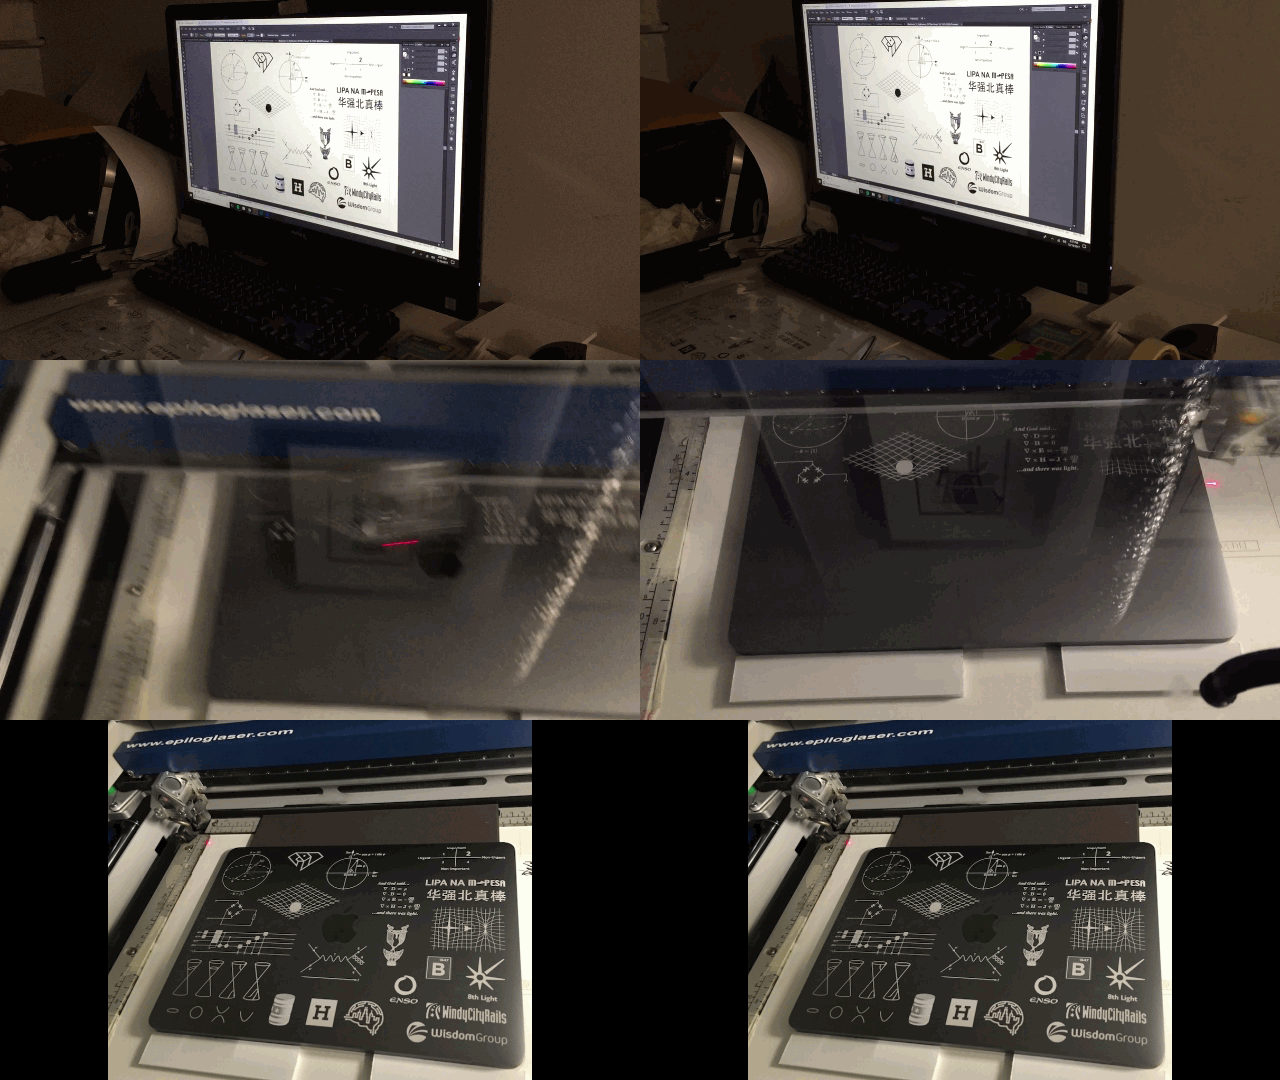
CAS uses an Epilog Laser machine. Beyond equipment, the engraving team needs to care deeply about alignment and attention to detail. The CAS team (Firoz, Christan, and Jenna) did an outstanding job with my engraving. Christan and Jenna were meticulous with the laser machine, double- and triple-checking the alignment. I emailed them a PDF before my visit, and they did a practice run on scrap acrylic. The acrylic aligned perfectly with the MacBook. It was clear that I had placed my trust in the right engraver.
Symbol Descriptions
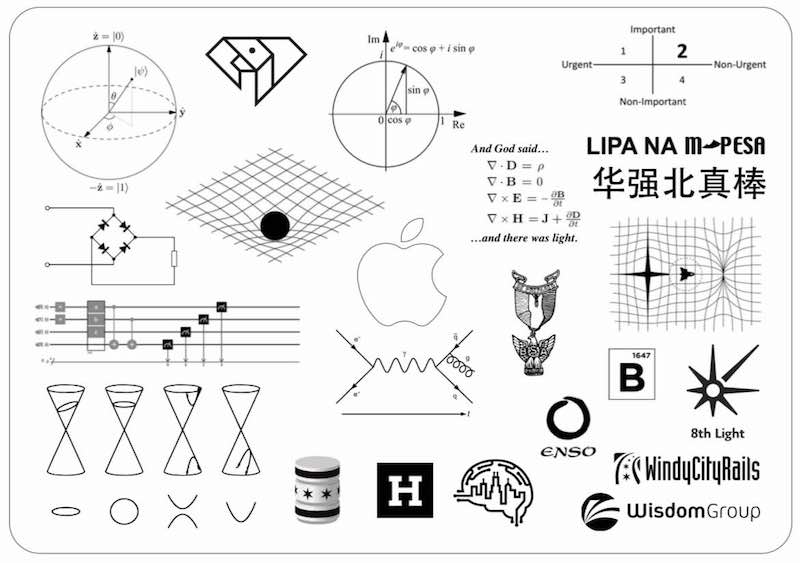
Here’s a description for each of the symbols, starting with the top-left corner and moving down, and then left to right.
- Bloch Sphere. Graphical representation of a qubit, the quantum computing equivalent of a digital computer’s bit. Quantum computing is fascinating largely because we know so little about quantum mechanics.
- Full-wave rectifier. The fundamental circuit of every computer power supply because it’s the first step in turning alternating current (from the electrical outlet) into direct current that our computers can use.
- Quantum Composer. From IBM’s quantum simulator. That was the state of quantum simulators in June 2018. If you’re reading this post far in the future, all of this may change.
- Conic sections. The trajectory of a baseball thrown by a player and the path of a planet revolving around a star can both be described by the mathematics of conic sections.
- RubyCaribe. An idea for a tech conference to be held in the Caribbean. Market realities kept me from launching this as early as I would have liked. You could say that I’m in the middle of a pivot on this one!
- Warped space-time. Graphical representation of space-time being warped by a massive, spherical object. Physicists theorize that what we perceive as gravity is actually the warping of space-time. The math supports the theory.
- Unit Circle. Graphical representation of Euler’s identity, which can be proven with series expansion.
- Apple.
- Feynman Diagram. Richard Feynman was a professor of physics at Caltech. He created these diagrams to graphically represent what happens when sub-atomic particles collide. In a Feynman diagram, time runs from left to right, and the lines show collisions and the release/absorption of energy.
- WindyCityDB. WindyCityDB was a NoSQL database conference held by my team in Chicago.
- H. The favicon and app icon for the RayHightower.com site.
- WindyCityThings. WindyCityThings was an Internet of Things (IoT) conference held by my team in Chicago.
- Maxwell’s Equations. Since light is a form of electromagnetic radiation, the reference to God’s words from the book of Genesis is fitting. I first saw science and faith tied together in this way on a poster in a professor’s office.
- Eagle Scout Medal. Some of my richest life experiences are connected to Scouting, including earning the rank of Eagle as a youth.
- Prioritization Matrix. This is from Stephen Covey’s book, The Seven Habits of Highly Effective People. Quadrant 2 is highlighted because if we spend our time on things that are important (but not urgent) we will avoid running around on random tasks (quadrant 1) and we will move closer to our goals.
- Lipa Na M-Pesa. Swahili for “Pay with M-Pesa”. M-Pesa is a mobile payment system that is integral to the economy in Kenya. M-Pesa has achieved higher penetration among mobile users within a country than any other mobile payment system in the world.
- 华强北真棒. Chinese for “Huaqiangbei is awesome”. Huaqiangbei is a region within the city of Shenzhen where tech manufacturers do business. If you own anything electronic, you can bet that some of the components passed through Huaqiangbei.
- Warp Drive. Physicists are researching ways to turn warp drive into reality. Two pioneers in the field: Miguel Alcubierre, theoretical physicist based in Mexico and Harold “Sonny” White, engineer and applied physicist at NASA in the USA. According to the math, it might be possible to propel a ship faster than the speed of light by warping space-time.
- Blue 1647. Blue 1647 is an amazing space for makers, technologists, entrepreneurs, software developers, artists, and musicians.
- 8th Light. 8th Light is the software consultancy that bought my company (WisdomGroup) in 2016.
- Enso. Enso is a Shotokan Karate Dojo led by Sensei Jay Nacu, Sensei Denise Nacu, and Sensei Saul Notario. Enso’s students are people of all ages, all backgrounds. The instructors have built a community based on continuous improvement and mutual respect.
- WindyCityRails. The Ruby on Rails conference that my team launched in Chicago in 2008.
- WisdomGroup. WisdomGroup is the technology company that I founded in 1994 and sold to 8th Light in 2016.
Conclusion
Hopefully this post gives you enough information to engrave your own devices, if you choose to do so.


