Manage That OpenROV Tether, Or Else
10 Sep 2014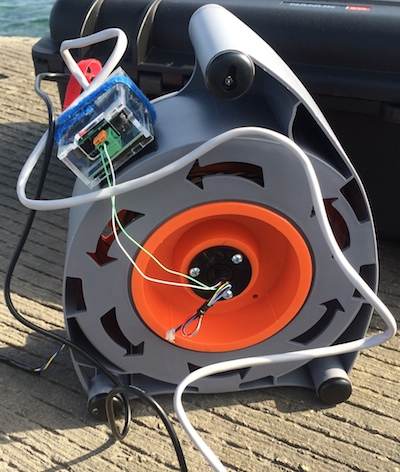
Note: This article has been updated with more photos and details describing slip ring installation.
Youthful exuberance drove me to pilot my OpenROV before I built a good tether management system. Bad idea! It’s better to have a tether management plan (any plan) before you pilot your OpenROV.
This article describes a tether management system that works for me. Other OpenROVers have devices that work, too. Take a look at a few and eventually you will find one that fits you.
Off-the-Shelf Parts
This tether management system is constructed entirely from off-the-shelf parts. The main component is an extension cord reel sold by Home Depot for about $14.00. Buy it, gut it, add the slip ring using three screws (also from Home Depot) and you’re good to go.

Slip Ring
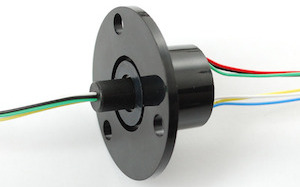
The slip ring is central to this solution. A slip ring allows an electrical spool to spin while electrical contacts remain intact. This slip ring was purchased from Adafruit for about $18.00.
How to Install the Slip Ring
First, pull the entire orange cable out of the extension cord reel. It would be great to keep the whole orange cable as part of the tether, but then we wouldn’t have room for the original tether (twisted pair). Cut the orange cable so that only one meter remains attached to the reel assembly.

Next, take the extension cord reel apart. Two phillips-head screws hold the device together. Remove the two screws, and the two orange disks will fall apart.
Now let’s focus on the disk without the electrical plugs. You will need to cut a hole in the exact center of this disk. The hole will need to be large enough to let the thicker part of the slip ring through, while allowing enough of an edge for the flange screws. The photos give a clearer picture than the words in this paragraph.
After you insert the slip ring, drill holes for the three slip ring mounting screws. One way to do this: Drill one hole first, insert the screw, tighten the nut, and then measure/drill the remaining holes. You’re more likely to align all of the holes correctly this way.
Loctite Threadlocker
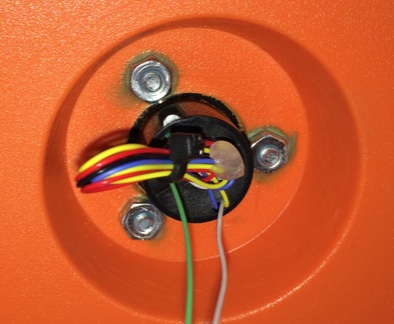
Loctite makes a threadlocker, a gummy substance that keeps screws from jiggling loose. They also make super glue; that’s not what you want for this project. If you use Loctite’s threadlocker on the slip ring screws, they will remain tight until you remove them on purpose.
Connecting Inside the Reel
Take a look inside the reel. You’ll see black, green, and white cables inside. You won’t need to do anything with the black cable. Splice the green line from the slip ring to the green line inside the reel, and splice the white slip ring line with the white reel line. Your technique may vary, but I used a combination hook splice, solder, hot glue, and heat shrink tubing. If you wear a belt and suspenders your pants will never fall down!
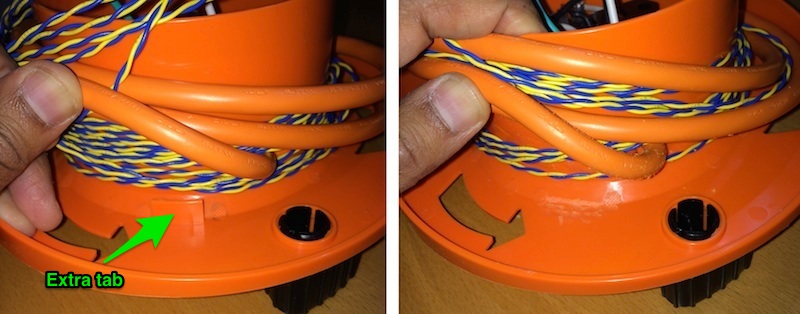
Gotcha: Removing the Extra Tab
After initial assembly, I noticed that there was an extra tab inside of the reel. I don’t know the original purpose for the tab, but since it appeared to interfere with tether operation, it had to go. Wire clippers and a dremel tool made quick work of the tab. The before & after photos tell the story.
Attaching the Tether & Topside Adapter
Now that you have a functioning reel with a slip ring, attach the twisted pair tether to the 1-meter orange extension cable. Hook splice, solder, hot glue, and heat shrink did the trick for me.
The topside adapter can be attached to the top of the reel with Velcro, as shown in the photos throughout this article. Plug the green and white cables from the outer slip ring into the topside adapter, and you’re ready to test the new tether management system.
What should we do with the slip ring’s extra lines? I tied mine together for future use. I may cut them if I decide that they’re not useful. If you have other ideas, feel free to post in the comments below.
Everything Fits
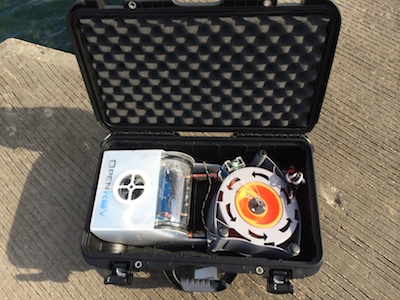
The new tether management system is small enough to share space with an OpenROV inside a Nanuk 935 case. The Nanuk case has wheels, a foam interior, and it is rugged and small enough to fly as an airline carry-on.
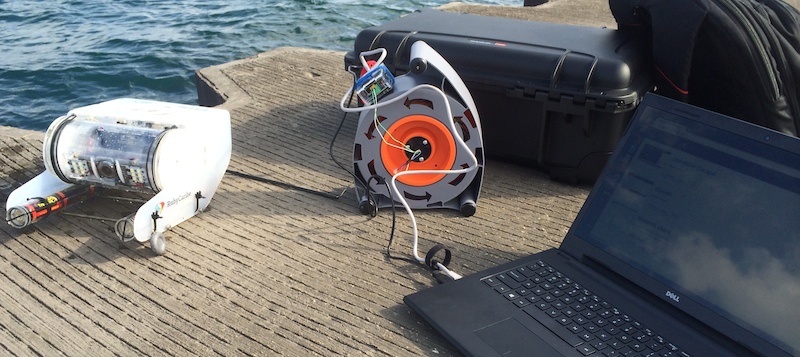
Whip everything out and you’re ready to explore.


