GitHub Pages: Quick Start Guide
22 Jul 2015GitHub Pages lets any holder of a GitHub account host static HTML pages at no cost. The bigger benefit: Pages hosted at GitHub automatically become part of GitHub’s content delivery network (CDN). People who visit your site will get faster page loads because of the CDN.
This article focuses on interacting with GitHub Pages via Git at the command line. The browser-based automatic page generator is already well-documented. Another purpose of this post: To put useful information about GitHub Pages all in one post, so I won’t have to go hunting around next time I forget this procedure!
Quick Start
A quick way to launch a “Hello World!” page via GitHub Pages…
-
Create a GitHub account for yourself.
-
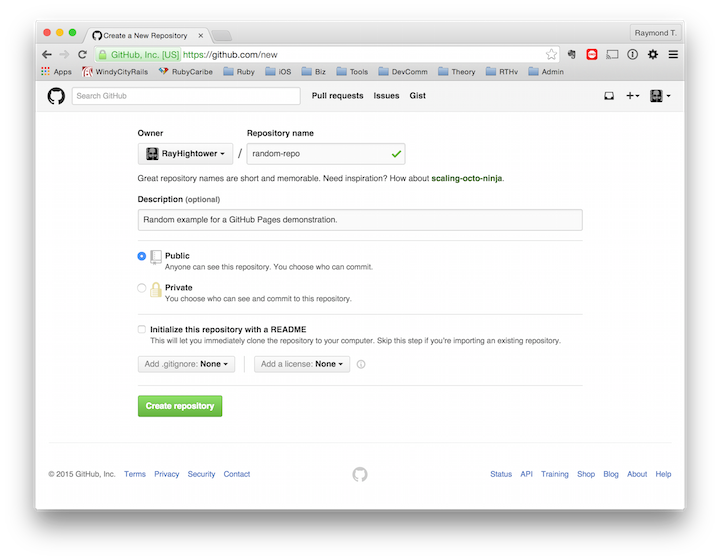
Create the repo where you want to publish a GitHub page. For example,
random-repo. Be sure to make the repo public, and don’t initialize it with a README file.

-
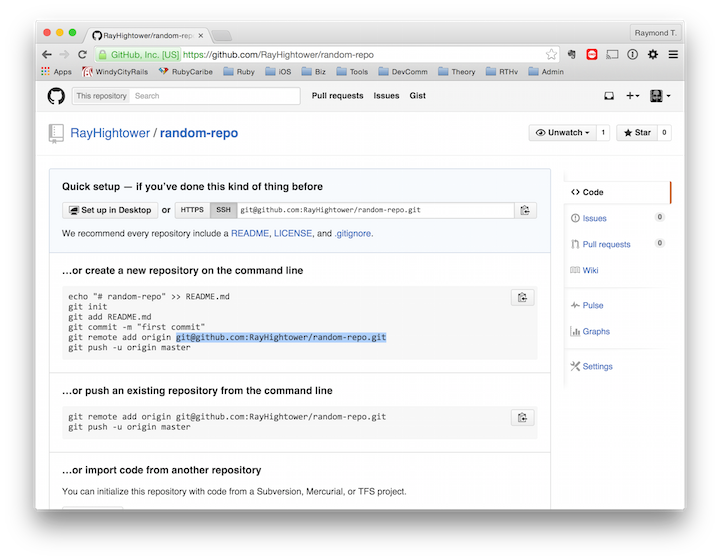
Clone the repo on your local machine.
-
cdinto therandom-repodirectory.
$ git clone git@github.com:RayHightower/random-repo.git
Cloning into 'random-repo'...
warning: You appear to have cloned an empty repository.
Checking connectivity... done.


$ cd random-repo

$

Don’t worry about the “cloned an empty repository” message. We’ll add something very soon!
-
Create and checkout the
gh-pagesbranch in the repo. -
Create a file called
index.htmlin thegh-pagesbranch. -
Using a text editor (or the fancy shortcut shown below) add the line “Hello World” to the
index.htmlfile.
$ git checkout -b gh-pages

$ touch index.html

$ echo "Hello World">index.html

$
-
Use
$ git add .to addindex.htmlto Git’s history. -
Use
$ git committo commit changes. -
Use
$ git pushto push thegh-pagesbranch to GitHub.
$ git add .

$ git commit -am 'initial commit'
[gh-pages (root-commit) 0d4a0ae] initial commit
 1 file changed, 1 insertion(+)
 create mode 100644 index.html

$ git push -u origin gh-pages
Counting objects: 3, done.
Writing objects: 100% (3/3), 236 bytes | 0 bytes/s, done.
Total 3 (delta 0), reused 0 (delta 0)
To git@github.com:RayHightower/random-repo.git
 * [new branch]      gh-pages -> gh-pages
Branch gh-pages set up to track remote branch gh-pages from origin.

$
- Open a web browser and navigate to
http://your-github-user-name.github.io/random-repo. For the example in this article, use http://rayhightower.github.io/random-repo. You should see the words “Hello World” in the browser window.

Congrats on your success!
GitHubber Alyson La demonstrates these steps in a 4-minute video, with some creative variations.
Hello World = Done. Enter Jekyll.
Now that Hello World! runs well, consider Jekyll. Jekyll will generate your static pages based on the rules you setup in the Jekyll templates.
Branches: gh-pages for Projects, master for Organizations
Most sites hosted through GitHub Pages will use the gh-pages branch. These are called Project Pages. For example, http://rayhightower.com/random-repo is a Project Page. Its files are in the gh-pages branch of https://github.com/RayHightower/random-repo.
Each GitHub account can have one repo called [account_name].github.io that uses the master branch. GitHub refers to these as Organization Pages. For example, http://rayhightower.github.io, also reachable via http://rayhightower.com, is an example of an Organization Page. Files for RayHightower.com are in the master branch of https://github.com/RayHightower/rayhightower.github.io/.
I do not know why GitHub Pages are configured this way. One guess: It makes it easier to keep your marketing site and application site in one repo, and they’ll never clobber each other if they’re in separate branches. If you know the official reason for the Organization vs Project page setup, feel free to share your insights in the comments below.
Conclusion
Enjoy GitHub Pages!


