BeagleBone Black, Up & Running
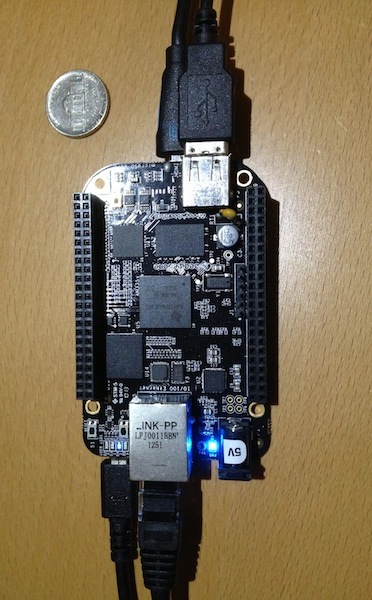
22 May 2013 BeagleBone Black, like the Raspberry Pi, is a small, inexpensive computer that runs Linux. It’s smaller than a deck of cards and you can buy one for about forty-five dollars ($45.00). The device is made by CircuitCo in Richardson, TX, USA.
It Just Works
BeagleBone Black runs Linux right out of the box. Steps required:
- Plug in the micro-HDMI cable for the monitor. See the “Gotchas” section about micro-HDMI below.
- Plug in the keyboard & mouse via the USB port. You might need a USB hub because the board only has one USB port.
- Add power via the mini-USB port or the 5v power connection.
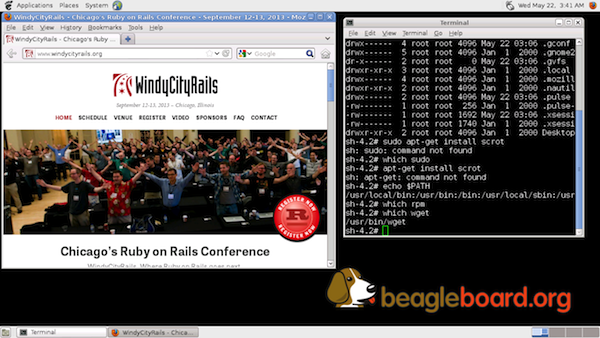
After a few minutes of boot time, we have a fully-functioning Linux computer with a GUI, Firefox browser, and other tools.
The BeagleBone Black has 2GB of flash storage on the board, and part of that is used for Linux. Here’s a screenshot after just a few minutes of ownership.

Documentation

All of the paper documentation for the BeagleBone Black fits on a slip of paper roughly the size of two business cards. The meat of the documentation resides on the device itself. To reach the electronic documentation:
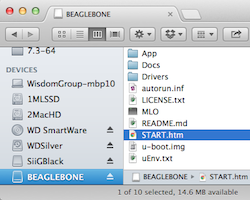
- Plug the BeagleBone Black into a USB port on your laptop.
- The board will appear as a USB storage device. One of the files at the
root of the storage device,
START.htm, contains the documentation. It can be viewed in a web browser.
The documentation recommends against MSIE.
Gotchas

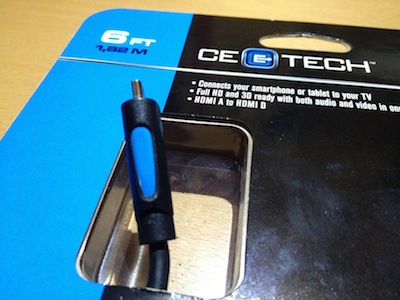
The manufacturer included a mini-USB cable with the device, so you can power it up right after you rip open the package. Gotcha: You need a micro-HDMI cable (or adapter) if you want to attach a monitor. I would have preferred a micro-HDMI-to-HDMI adapater in the box instead of the mini-USB cable. That’s a little nit-picky on my part since micro-HDMI cables are easy to find at Home Depot.
A quick shout-out to Home Depot: Their store-brand cables let you test the cable end without opening the package, right in the store. Excellent package design by Home Depot.
My second “gotcha” is more important: The curl command did not behave as flawlessly as it did with the Raspberry Pi, so I was not able to install Ruby as quickly as planned. Details below.
Installing Rails
I will have to cover Ruby and Rails installation in a future blog post because my initial attempts were not successful.
Update (Jan 2014): Ruby, Rails, and Ubuntu will run on the BeagleBone Black. Installation details
RVM, Ruby, and Rails installed easily with Raspberry Pi, even though the compilation time was long. With the BeagleBone Black, I received the following in response to the curl command:
sh-4.2# curl -L https://get.rvm.io | bash -s stable --ruby
  % Total    % Received % Xferd  Average Speed   Time    Time     Time  Current
                                 Dload  Upload   Total   Spent    Left  Speed
  0     0    0     0    0     0      0      0 --:--:-- --:--:-- --:--:--     0
curl: (77) Problem with the SSL CA cert (path? access rights?)
sh-4.2#
Maybe it’s time to try RBEnv? I’ll post a solution when I find it. Or… if a reader of this blog already has a solution for the BeagleBone Black Rails installation challenge, please post in the comments below and I’ll credit you here.
#BeagleBone Black vs. Raspberry Pi
Which is better, BeagleBone Black or Raspberry Pi? There’s no clear winner in my opinion. It’s a matter of trade-offs:
- The ‘Bone runs Linux right out of the box, while it takes some time to get Linux running on the Pi, unless you buy a card pre-configured for the Pi.
- RVM, Ruby, and Rails installation was painless on the Pi even though compilation time was long. The jury is still out w/r/t RVM on the ‘Bone.
- Cost-wise, they’re within ten bucks of each other. That’s a wash.
- The ‘Bone has more Ardunio-like provisions for digital projects.
- The Pi includes an RCA output for older TVs. Plus the Pi uses standard HDMI, so there’s no need to get a special micro-HDMI cable.
I’ve owned my ‘Bone for just over 24 hours. Lots more to learn. Looking forward to it!


