
Parallella Quick Start Guide (with gotchas)
07 Jul 2014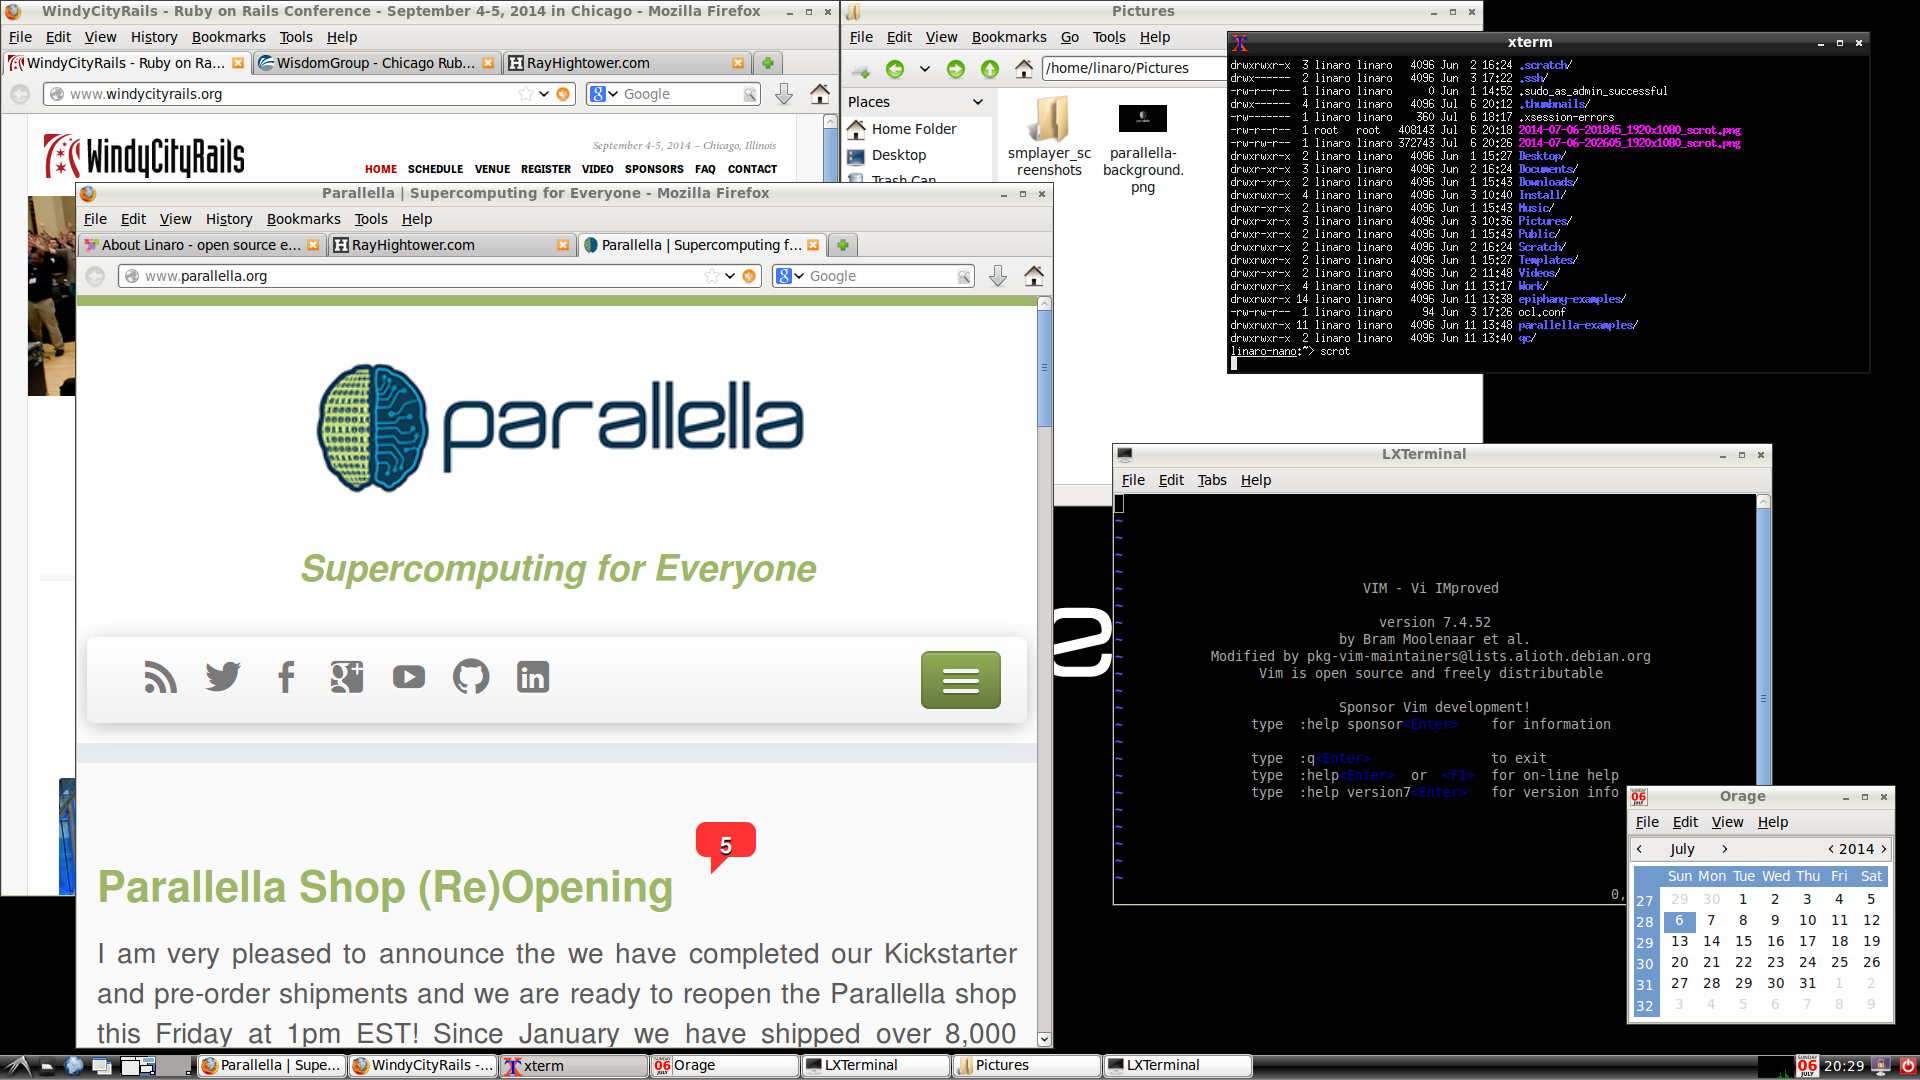
Update: Here’s a 25-minute video intro to Parallella.
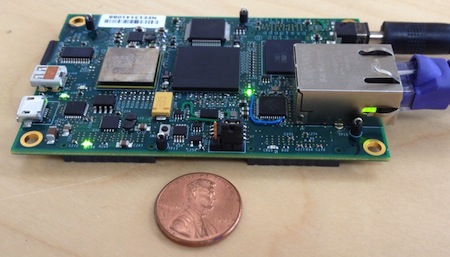
Parallella is a single-board supercomputer smaller than a deck of cards. While today’s fastest laptops contain four processor cores, Parallella has eighteen (2 ARM cores plus an Epiphany chip with 16 RISC cores). The maker of Parallella, Adapteva, is on a mission to democratize parallel computing. The company’s tag line is Supercomputing for Everyone.
Everything in this post is based on the official quick start guide created by the Parallella team. These instructions are tailored for a Mac running OS X Mavericks (10.9.3) and a Parallella-16 equipped with the Zynq 7010 chip. I ran into some gotchas during my first Parallella experience. The snags (and solutions) are documented here.
Tools Required
You will need the following items in order to burn an SD card for your Parallella:
- Micro-SD card, 16GB or greater.
- Desktop or laptop computer with a micro-SD card reader, or an SD-card reader with a micro adapter. These instructions are tailored for a Mac. A Linux or Windows machine will work with minor modifications in the procedure.
- High-speed internet connection, for downloading Parallella’s Ubuntu image and related files.
- Micro-USB-to-USB adapter, for the keyboard and mouse. Parallella is equipped with two micro-USB ports.
- Micro-HDMI to HDMI cable or adapter.
- Parallella (of course!)
Adapteva sells an accessories kit containing an SD card, power adapter, micro-HDMI to HDMI cable, and USB-to-micro-USB adapter. Unless you already have these items, buying the kit may save you time.
These Steps Could Break Your Primary Machine
Since you’re experimenting with Parallella, we can assume that you are an advanced user. Your computer is already backed up, or you’re running these steps on a test machine. And you know the power and pitfalls of sudo. Technology evolves rapidly, and everything you read here could change by the time you read it.
Comparison with Raspberry Pi or Beaglebone Black
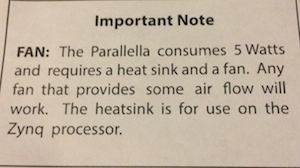
How does the Parallella compare with other single-board computers, like the Raspberry Pi or Beaglebone Black? The first difference noticed at boot-time: Parallella runs hot! So hot, in fact, that the unit comes with a heat sink and the recommendation to add a fan. I’ve never needed a fan with a Pi or a ‘Bone.
Of course, the Parallella runs hotter because it has more processing power packed tightly together in limited space. Since Parallella is designed to run tasks in parallel, we can expect certain programs to perform faster than they would on the Pi or ‘Bone. Future posts will explore Parallella’s performance using languages designed for concurrency, languages like Go and Rubinius. Now, let’s get started with Parallella.
Getting the Parallella OS
Parallella runs a customized version of Ubuntu installed on a micro-SD card. Burning the SD card takes a long time, so it makes sense to start that process first.
Download the files that you will need to burn onto the SD card. I’m running Mac OS X on my primary machine, and I’m configuring a Parallella-16 with a Zynq 7010 and an HDMI display. Therefore, the files needed for this configuration are:
- Ubuntu 14.04 for Parallella (released June 11, 2014)
- Linux kernel with HDMI support
- Parallella-16 Zynq 7010 with HDMI display (Thanks Bryan Zake for providing an updated link on 07Mar2017.)
Unzip the files and place them in a directory that’s handy. You’ll need them for the next step. With Mac OS X, you can unzip the files by double-clicking them in Finder.
Note: You might need different files depending on the current date (Parallella software is in a rapid state of flux) and your exact equipment. If your configuration is different, you can make the adjustments described in Parallella’s official guide.
Burn the SD Card
Insert your SD card into your Mac’s SD card reader, and use the Mac OS X diskutil list command to determine the designation of the SD card. If you use portable hard drives with your primary machine, the SD card designation could change from time to time, so it’s important to perform this step each time you burn a card.
$ diskutil list
/dev/disk0
   #:                       TYPE NAME                    SIZE       IDENTIFIER
   0:      GUID_partition_scheme                        *500.3 GB   disk0
   1:                        EFI EFI                     209.7 MB   disk0s1
   2:                  Apple_HFS MacSSD                  499.4 GB   disk0s2
   3:                 Apple_Boot Recovery HD             650.0 MB   disk0s3
/dev/disk1
   #:                       TYPE NAME                    SIZE       IDENTIFIER
   0:     FDisk_partition_scheme                       *15.9 GB     disk1
   1:               Windows_NTFS Untitled 1             15.9 GB     disk1s1

$
From this diskutil report, we can see that we want to burn the SD image to /dev/disk1. The other device is the hard drive for my primary machine. Burning the wrong device means destroying data.
To burn the SD card…
- Change into the directory where you downloaded the Ubuntu image.
- Unmount the destination partition on the SD card.
- Use the the
ddcommand to copy the Ubuntu image to the SD card.
To execute the above steps as bash commands, do the following:
$ cd [directory containing the ubuntu image file]

$ diskutil unmountDisk /dev/disk1
Unmount of all volumes on disk1 was successful

$ sudo dd if=ubuntu-14.04-140611.img of=/dev/disk1 bs=64k
Password:
The dd command takes a long time to run, over 56 minutes on my machine. Here’s a quick run-through of the command options:
sudogives you super powers.ddis the “copy and convert” command. The letters “dd” have nothing to do with what the tool actually does. It’s just a command name. And like so many things in computer science, the name might be based on a pun.if=specifies the input file. You can include the full path, or if the file is in your current directory, you can omit the path as shown in this example.of=specifies the output file. We know that the SD card is located at/dev/diskso that’s where the results of this command are headed. Note that your destination directory may differ from this one.bs=specifies the block size used for the destination file.
About Block Size
The Mac section of the official Parallella guide recommends a block size of size of 1 megabyte, while the Linux instructions recommend 64 kilobytes (the option bs=64k in the dd command). I initially used bs=1m on my Mac, and I ran into problems. When I used bs=64k, everything worked fine. Note that I eventually traced my problem to something other than block size (details below) but since the 64k setting still works, I’ve left it intact. If I find out why Linux and OS X are using different block sizes, I’ll post the information here.
Checking dd Progress
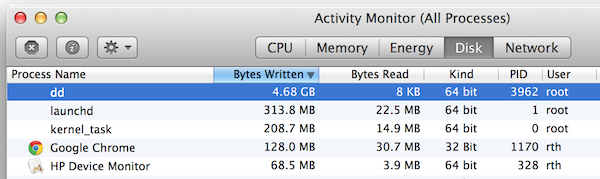
Waiting an hour for the dd command to run can be disconcerting because the machine does not give any feedback on progress. No gas gauge, spinning indicator, nothing. How do we know if the write process is working?
Here’s how to check progress. Run Apple’s Activity Monitor, and look for dd on the list of processes, as shown in the Activity Monitor screenshot. The number of bytes written will increase slowly while dd burns the Ubuntu image onto the SD card. With the current version of Ubuntu, roughly 7.4GB will be written to the SD. At completion, dd will disappear from the Activity Monitor list and you’ll see the following at the command line.
$ sudo dd if=ubuntu-14.04-140611.img of=/dev/disk1 bs=64k
Password:
121280+0 records in
121280+0 records out
7948206080 bytes transferred in 3363.824531 secs (2362848 bytes/sec)

$
As you can see from the report, it took 3363.824531 seconds (just over 56 minutes) for dd to burn the Ubuntu image onto the SD card. That’s a long time to wait with zero feedback. Activity Monitor will tell you what’s going on.
Confirm Partitions
To confirm that the partitions have been created and that Ubuntu has been written to the SD card, use diskutil list again.
$ diskutil list
/dev/disk0
   #:                       TYPE NAME                    SIZE       IDENTIFIER
   0:      GUID_partition_scheme                        *500.3 GB   disk0
   1:                        EFI EFI                     209.7 MB   disk0s1
   2:                  Apple_HFS MacSSD                  499.4 GB   disk0s2
   3:                 Apple_Boot Recovery HD             650.0 MB   disk0s3
/dev/disk1
   #:                       TYPE NAME                    SIZE       IDENTIFIER
   0:     FDisk_partition_scheme                        *15.9 GB    disk1
   1:                 DOS_FAT_32 BOOT                    134.2 MB   disk1s1
   2:                      Linux                         7.3 GB     disk1s2

$
As expected, /dev/disk0 remains unchanged. We want it that way because that’s where our primary machine’s operating system resides. /dev/disk1 (your actual SD card designation may be different) is the target disk we’re after. Two new partitions are on the SD card, a FAT32 partition named BOOT and a Linux partition.
Next we need to copy some supporting files to the new BOOT partition.
Copying Additional Files to the SD Card
Now that Ubuntu resides on the SD card, it’s time to add the files that support HDMI video and the FPGAs. Here’s how.
The additional files will need to be copied to /BOOT on the SD card. While it might make sense to reach the BOOT partition as /dev/disk1, you will actually reach it via /Volumes/BOOT.
We target /dev/disk1 when burning the Ubuntu image, but to copy the supporting files we target /Volumes/BOOT. Both designations point to the same place, the SD card. Why the name switch?
I don’t know why two different designations are used for the same SD card. I only know that it works. You can expect to see an update posted here if I find an explanation. Or if you have an answer, feel free to post in the comments below.
Before we copy over the files, let’s see what’s on the BOOT partition on the SD card.
~$ cd /Volumes/BOOT/

/Volumes/BOOT$ ls -al
total 12
drwxrwxrwx@ 1 rth   staff   512 Jul  5 23:44 .
drwxrwxrwt@ 4 root  admin   136 Jul  5 23:44 ..
drwxrwxrwx  1 rth   staff   512 Jul  5 23:44 .Spotlight-V100
drwxrwxrwx@ 1 rth   staff   512 Jul  5 23:44 .Trashes
-rwxrwxrwx  1 rth   staff  4096 Jul  5 23:44 ._.Trashes
drwxrwxrwx  1 rth   staff   512 Jul  5 23:44 .fseventsd

/Volumes/BOOT$
Gotcha #1: The FPGA Bitstream File
First, change into the directory where you stored the additional Parallella files, and copy the FPGA bitstream file to /Volumes/BOOT.
$ cp parallella_e16_hdmi_gpiose_7010.bit.bin /Volumes/BOOT/

$ cd /Volumes/BOOT/

$ mv parallella_e16_hdmi_gpiose_7010.bit.bin parallella.bit.bin

$
First gotcha: I made the mistake of simply copying the parallella_e16_hdmi_gpiose_7010.bit.bin file without renaming it to parallella.bit.bin. Parallella will only boot when it sees a file with this filename on the SD card’s BOOT partition. The original file name will probably change as the software gets updated. With each change, we will need to make sure that the file is renamed parallella.bit.bin on the Parallella.
Obvious in hindsight, but it took me awhile to track that one down!
Copy the Last Two Files
Two files were decompressed from kernel-hdmi-default.tgz: devicetree.dtb and uImage. Change into the directory where the files were decompressed, and copy them to /Volumes/BOOT.
$ cp devicetree.dtb /Volumes/BOOT/

$ cp uImage /Volumes/BOOT/

$
Here’s what the BOOT partition should look like when you’re done..
/Volumes/BOOT$ ls -al
total 12853
drwxrwxrwx@ 1 rth   staff     1024 Jul  6 12:14 .
drwxrwxrwt@ 4 root  admin      136 Jul  6 12:11 ..
drwxrwxrwx  1 rth   staff      512 Jul  6 12:11 .Spotlight-V100
drwxrwxrwx@ 1 rth   staff      512 Jul  6 12:11 .Trashes
-rwxrwxrwx  1 rth   staff     4096 Jul  6 12:11 ._.Trashes
-rwxrwxrwx  1 rth   staff     4096 Jul  6 12:13 ._devicetree.dtb
-rwxrwxrwx  1 rth   staff     4096 Jul  6 12:14 ._parallella.bit.bin
-rwxrwxrwx  1 rth   staff     4096 Jul  6 12:13 ._uImage
drwxrwxrwx  1 rth   staff      512 Jul  6 12:11 .fseventsd
-rwxrwxrwx@ 1 rth   staff     8607 Jul  6 12:13 devicetree.dtb
-rwxrwxrwx@ 1 rth   staff  2083744 Jul  6 12:14 parallella.bit.bin
-rwxrwxrwx@ 1 rth   staff  4468792 Jul  6 12:13 uImage

/Volumes/BOOT$
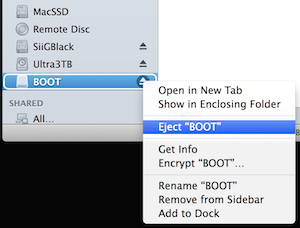
Eject the SD Card, Insert in Parallella
Now you’re ready to eject the SD card from the Mac and insert it in the Parallella. Plug in the HDMI cable, keyboard, mouse, and Ethernet connection. Power up the Parallella, and welcome to the next gotcha.
Gotcha #2: Powered USB Required
Parallella booted to a beautiful GUI, but the system would not respond to the keyboard or mouse. After swapping a few keyboard/mouse combinations, I finally tried a powered USB hub. The powered hub worked.
Through trial and error I learned that the Parallella can handle a single keyboard plugged into the micro-USB port. However, if two devices are plugged in via USB, a powered hub is required. A passive USB hub will not work. A combination keyboard, one with both a keyboard and a trackpad, will also need a powered USB hub.
Default Login Credentials
Default login credentials for Parallella are…
- username = linaro
- password = linaro
SSH, Vim, Git, etc.
You can SSH into the Parallella from the network…
~$ ssh linaro@192.168.11.133
linaro@192.168.11.133's password:
Welcome to Linaro 14.04 (GNU/Linux 3.12.0-g0bc9c3a-dirty armv7l)

 * Documentation:  https://wiki.linaro.org/
Last login: Sun Jul  6 17:34:17 2014 from wisdomgroup-mbp13
linaro-nano:~>
… Vim is operational…
linaro-nano:~> which vim
/usr/bin/vim
linaro-nano:~> vim --version
VIM - Vi IMproved 7.4 (2013 Aug 10, compiled Jan  2 2014 19:49:14)
linaro-nano:~>
… and Git works fine.
linaro-nano:~> which git
/usr/bin/git
linaro-nano:~> git --version
git version 1.9.1
linaro-nano:~>
Scrot for Screenshots
If you want to take a screenshot of the Parallella display, use scrot. It comes with the Ubuntu installation. Type scrot at the command line and hit enter. Five seconds later, the entire screen will be captured and stored in a file called [time stamp]_1920x1080_scrot.png in the current directory.
Conclusion
After waiting a year for Parallella to arrive, I’m excited to have the device up and running. Future posts will explore the “why?” behind parallel computing. Thanks Adapteva for helping to democratize supercomputing. Awesome times are ahead!