Massively Parallel Parallella
27 May 2015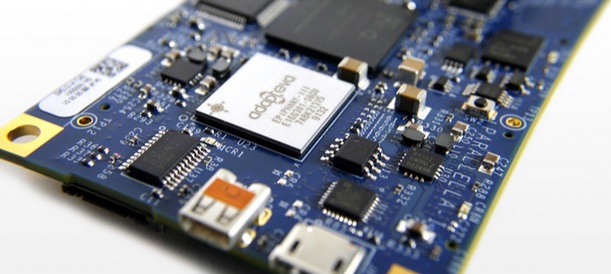
Supercomputer.io is the first technical conference for Parallella, to be held May 30, 2015 in Tokyo, Japan.
You can participate even if you’re not in Tokyo. Parallella owners around the world will connect their boards via the Internet to create the most efficient supercomputer on the planet. Resin.io has built a special micro-SD-card image (using Docker) so adding your Parallella to the mix is relatively quick.
This article includes detailed steps plus a few gotchas.
First: Why?
Some problems are too thorny for a typical computer to solve in a reasonable amount of time. Supercomputers might solve these problems quicker, but they cost millions of dollars. Solution: Link a bunch of $100, 18-core Parallella computers together via the Internet to amplify our compute power while saving money. This shared computing technique has worked in the past:
-
Through Stanford Folding@home, computer owners around the world are using excess CPU cycles to search for cures for diseases like Alzheimer’s, Huntington’s, and Parkinson’s.
-
The SETI@home project uses computers around the world to download and analyze radio telescope data to help with the search for extraterrestrial intelligence.
The benefits are clear. Let’s get started.
Materials Required
Here’s what you need to participate:
- Parallella board. You can buy one for about $100 at these retailers.
- Ethernet connection to the Internet.
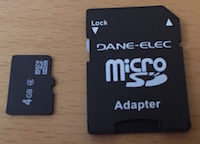
- 4 GB (or larger) micro-SD card.
This procedure is has been tested on Mac OS X Yosemite (10.10.3). Linux instructions are probably similar.
Gotcha: Headless Parallella
Something that tripped me up until I learned more: A Parallella configured for Supercomputer.io will run headless. There will be no HDMI output. When my HDMI monitor showed No Signal, I thought that I had broken something. No worries. This is just a headless system.
I don’t know if that will change.
Download the Image
Download the Resin.io image from the Supercomputer.io site. Resin.io has created a special SD-card image (using Docker) for this project. As you can see below, I stored mine in a directory called ~/Downloads/Parallella$.
~/Downloads/Parallella$ ls -al
total 2678784
drwxr-xr-x   3 rth  staff         102 May 26 10:53 .
drwx---r-x+ 86 rth  staff        2924 May 26 11:00 ..
-rw-r-----@  1 rth  staff  1371537408 May 26 10:56 resin-supercomputer-0.1.0-0.0.14-Z7010-16.img

~/Downloads/Parallella$
Prep for Burning the SD Card
Burning the SD card took about sixteen minutes (once I got the procedure right, as described below). Suggestion: Start the burn process, make sure it’s progressing, and then go work on something else. A watched pot never boils.
Insert your SD card into your Mac’s SD card reader, and use the Mac OS X diskutil list command to determine the designation of the SD card. If you use portable hard drives with your primary machine, the SD card designation could change from time to time, so it’s important to perform this step each time you burn an SD card.
~/Downloads/Parallella$ diskutil list
/dev/disk0
   #:                       TYPE NAME                    SIZE       IDENTIFIER
   0:      GUID_partition_scheme                        *960.2 GB   disk0
   1:                        EFI EFI                     209.7 MB   disk0s1
   2:                  Apple_HFS MacSSD                  959.3 GB   disk0s2
   3:                 Apple_Boot Recovery HD             650.0 MB   disk0s3
/dev/disk2
   #:                       TYPE NAME                    SIZE       IDENTIFIER
   0:     FDisk_partition_scheme                        *8.0 GB     disk2
   1:               Windows_NTFS Parallella              8.0 GB     disk2s1

~/Downloads/Parallella$
From this diskutil report, we can see that we want to burn the SD image to /dev/disk2. The other device is the hard drive for my primary machine. Burning the wrong device will destroy data.
Burning the Card, Skipping the Gotcha
To burn the SD card…
- Change into the directory where you downloaded the
resin.ioimage. - Unmount the destination partition on the SD card.
- Use the the
ddcommand to copy theresin.ioimage to the SD card.
Gotcha alert: The first time I attempted to burn the image, I used a block size of 64k (bs=64k) for the dd operation. Big mistake on my part because the write operation took almost four hours. On my second attempt, I used a 1 megabyte block size (bs=1m) and the write operation finished in a speedy 16 minutes. So, learn from my pain and use bs=1m.
Burn your micro-SD card like so:
$ cd [directory containing the resin.io image file]

$ diskutil unmountDisk /dev/disk2

$ sudo dd if=resin-supercomputer-0.1.0-0.0.14-Z7010-16.img of=/dev/disk2 bs=1m
Password:
1308+0 records in
1308+0 records out
1371537408 bytes transferred in 960.001945 secs (1428682 bytes/sec)

$

If you want to make sure that dd is running properly, use OS X’s Activity Monitor utility to monitor burn progress (see the ‘burn progress’ diagram). Here’s a quick run-through of the dd command options:
sudogives you super powers.ddis the “copy and convert” command. The letters “dd” have nothing to do with what the tool actually does. It’s just a command name. And like so many things in computer science, the name might be based on a pun.if=specifies the input file. You can include the full path, or if the file is in your current directory, you can omit the path as shown in this example.of=specifies the output file. We know that the SD card is located at/dev/diskso that’s where the results of this command are headed. Note that your destination directory may differ from this one.bs=1mspecifies the block size used for the destination file. 1 megabyte worked well on my machine.
About the New Resin.io Image
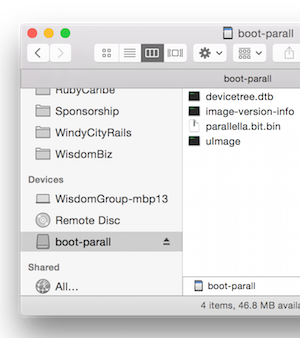
The new image will be called boot-parall as shown in the diagram. Depending on your particular image, your list of files may be the same as mine.
Boot Parallella with the Resin.io Image
Once the micro-SD card has been burned, eject it from the Mac and insert it into the Parallella. Then apply power to the Parallella.
Working Headless
As mentioned above, a Parallella configured this way will run headless, without HDMI output. So, how do you know if the Resin.io image is working?
First, get a network scanner and use it to locate your Parallella on your local area network. I use an iPad app called Fing, but any good network scanner will do. Your Parallella will appear as parallella-hdmi-resin, along with its corresponding IP and MAC addresses.
Ping the IP address given by your network scanning tool like so:
~$ ping 192.168.11.132
PING 192.168.11.132 (192.168.11.132): 56 data bytes
64 bytes from 192.168.11.132: icmp_seq=0 ttl=64 time=4.767 ms
64 bytes from 192.168.11.132: icmp_seq=1 ttl=64 time=3.694 ms
64 bytes from 192.168.11.132: icmp_seq=2 ttl=64 time=4.057 ms
64 bytes from 192.168.11.132: icmp_seq=3 ttl=64 time=3.969 ms
^C
--- 192.168.11.132 ping statistics ---
4 packets transmitted, 4 packets received, 0.0% packet loss
round-trip min/avg/max/stddev = 3.694/4.122/4.767/0.396 ms

~$
If your Parallella is up, running, and attached to your network, your
output will look similar to what you see above. But if ping can’t find
your Parallella, you’ll get…
~$ ping 192.168.11.199
PING 192.168.11.199 (192.168.11.199): 56 data bytes
Request timeout for icmp_seq 0
Request timeout for icmp_seq 1
Request timeout for icmp_seq 2
^C
--- 192.168.11.199 ping statistics ---
4 packets transmitted, 0 packets received, 100.0% packet loss

~$
Connect to Supercomputer.io
After you have successfully connected your Parallella to your LAN and the Internet, visit http://supercomputer.io/#/devices/ from a computer other than your Parallella (because the Parallella is headless). This page will tell you when your Parallella has connected to the Supercomputer.io mothership.
To do this, you will need the media access control (MAC) address (also known as the hardware address) for your Parallella’s network interface. I used my network scanning tool, Fing, to find the MAC address for the Parallella. You should be able to do the same with your network scanning tool.
Enter your Parallella’s MAC address in the field on the form, and click search to determine whether your device has connected.
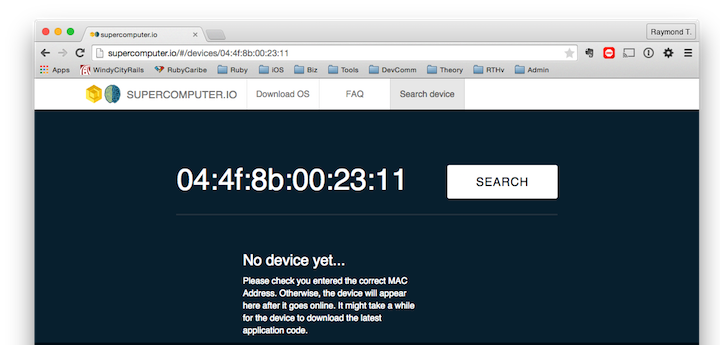
Your first connection attempt might not be successful. It takes awhile for the first connection to happen because the Parallella might need to download software updates first.
It took about 30 minutes for Supercomputer.io to recognize my Parallella. The successful connection was cause for celebration:
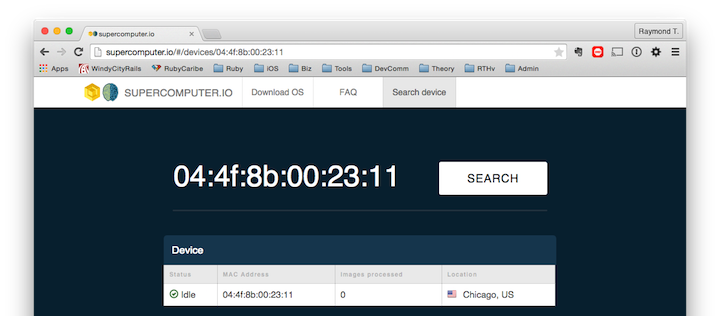
What’s Next?
I’m not sure what’s next for Supercomputer.io and Parallella. I would imagine that Status = idle will be replaced by something more interesting, and images processed will eventually be greater than zero.
Engineers at Parallella and Resin.io have done a great job so far. Now, since it’s likely that they enjoy ideas from the peanut gallery, here are a few suggestions for them:
-
Consider a version of the Resin.io image with HDMI support. Like many in the Parallella community, I’m willing to share CPU cycles for the greater good. And I want to see what’s running on my Parallella, too.
-
Add more metrics to the Supercomputer.io site. It’s nice to see the number of cores that have connected to Supercomputer.io. How about a map showing where the different Parallella devices are located? How about a dashboard that shows the number of cores currently in use?
Hats off to the Parallella and Resin.io teams. Looking forward to more!
