Animated Graphics in Ruby
15 Feb 2017There is nothing like a good problem to spark the synapses, is there? To open the mind to new possibilities, new ways of seeing things. Of course, one must always confront self doubt and fear. But that is a small price to pay for the exhilaration of finding the perfect solution.
~Kurros, Think Tank
Star Trek Voyager, S5E19
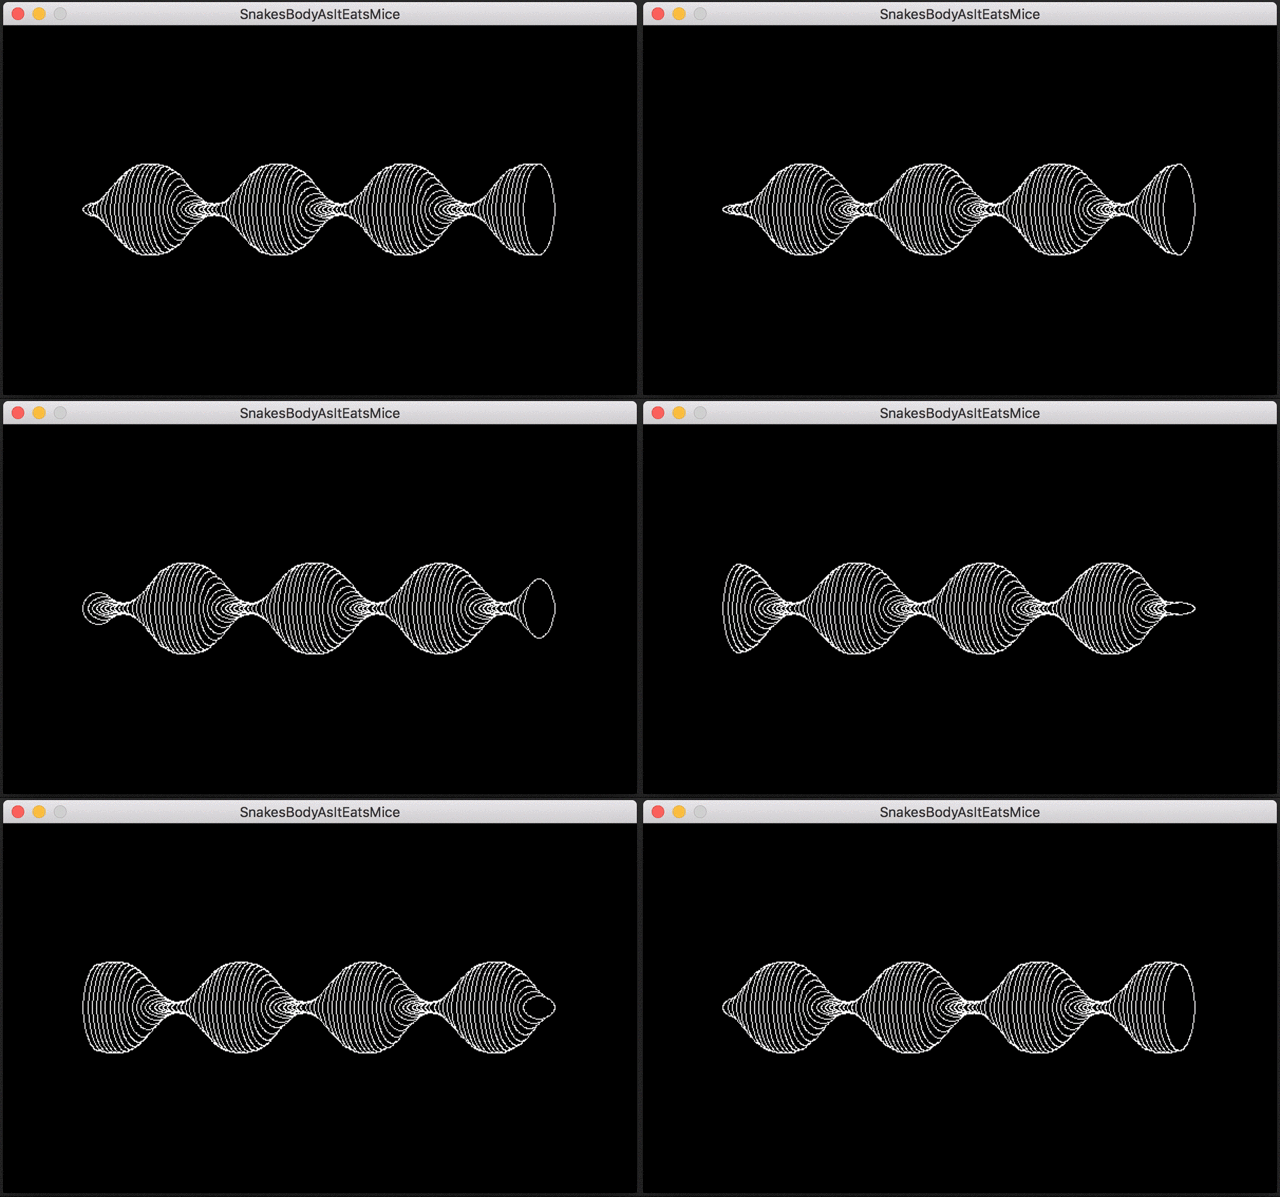
 Josh Cheek likes to wrestle with good problems. In a single week, his mind might race between software development, quantum physics, music, and mathematics. Last Friday, Josh tweeted about some of his animated graphics experiments in Ruby. He linked to a GitHubGist with source code for the sine wave animation displayed with this article.
This post lists Josh’s code, along with the steps required to install the dependencies and make the snippet run.
3D Sine Wave Source Code
If you download the code as snake.rb and try to run it from the command line using…
$ ruby snake.rb
…it won’t run, unless you already have the dependencies installed on your system. Source code for the 3D sine wave animation appears below.
# Recreating the second example from here (they're at the bottom) https://learningd3.com/blog/generative-art/
# First one is at https://gist.github.com/JoshCheek/d29901f7872711b1c70faafbc334e336
require 'graphics'

class SnakesBodyAsItEatsMice < Graphics::Simulation
  include Math

  def initialize
    super 600, 350, 24
    @speed      = 0.225
    @num_lines  = 100
    @num_waves  = 3.5
    @h_margin   = 75

    # How many ellipses does the radius pass through? (0.5) would mean their edges touch instead of overlapping
    num_widths = 4

    # Height radius when inflated and deflated
    @e_max_height = h/8.0
    @e_min_height = h/60.0

    # These shouldn't need tweaking, they're for calculating the center and width of the ellipses
    @e_offset    = (w - 2*@h_margin)/(@num_lines+2.0*num_widths-1)
    @e_width_rad = num_widths*@e_offset-1
  end

  def draw(time)
    clear :black
    @num_lines.times do |j|
      e_height_radius = (
        sin(sin(sin(sin(
          (j-time*@speed) /
            @num_lines *
            2*PI *
            @num_waves
        )))) /
          sin(sin(sin(1))) +

          1
      ) /
        2 *
        (@e_max_height - @e_min_height) +
        @e_min_height

      draw_segment @h_margin+@e_width_rad+j*@e_offset, h/2,
                   @e_width_rad, e_height_radius,
                   :white, :black
    end
  end

  def draw_segment(x, y, w, h, border_color, fill_color)
    ellipse x, y, w-1, h-1, fill_color,   true
    ellipse x, y, w,   h,   border_color, false
  end
end

SnakesBodyAsItEatsMice.new.run
SDL, Installed via Homebrew
For macOS users, some of the dependencies are easier to install via Homebrew. Start with Simple DirectMedia Layer (SDL), which is is responsible for displaying graphics for this snippet.
$ brew install sdl

==> Downloading https://homebrew.bintray.com/bottles/sdl-1.2.15.sierra.bottle.3.tar.gz
######################################################################## 100.0%
==> Pouring sdl-1.2.15.sierra.bottle.3.tar.gz
🍺  /usr/local/Cellar/sdl/1.2.15: 225 files, 1.4M

$
You will also need to use Homebrew to install related SDL libraries…
$ brew install sdl_mixer$ brew install sdl_image$ brew install sdl_ttf
That’s it for Homebrew. Now to install Ruby/SDL.
Ruby/SDL, Installed via RubyGems
Ruby/SDL enables Ruby programs to use SDL. SDL must be installed first in order for the RSDL gem to compile.
$ gem install rsdl
Finally, Install the Graphics Gem
Josh uses the graphics gem by Ryan Davis. Since the gem is still under development (as of this writing) it needs to be installed like so:
$ gem install graphics -v 1.0.0b1 --pre

Building native extensions.  This could take a while...
Successfully installed graphics-1.0.0b6
Parsing documentation for graphics-1.0.0b6
unable to convert "\xE9" from ASCII-8BIT to UTF-8 for ext/sdl/sge/WhatsNew, skipping
Installing ri documentation for graphics-1.0.0b6
Done installing documentation for graphics after 0 seconds
1 gem installed

$
Gotcha: If you run into installation trouble, double-check the dependencies. And if this article happens to be out of date, feel free to tell me so in the comments below.
Now, Run the Snippet
With all of that done, we can now run the snippet…
$ ruby snake.rb
…with the following result.

Conclusion
Mission accomplished! Thanks Josh Cheek for inspiring this post, and thanks Ryan Davis for creating the graphics gem.


